Creating Pitch Decks

In recent years, "pitch decks" have become a standard feature when pitching one's TV show or movie.  Essentially, they give a sense of the story you're trying to tell in pictures with some commentary. They supplement the logline and the synopsis, and can contain both.

Text to image AI has dramatically altered the approach. Now, instead of searching endlessly for stock images to get a glimpse of your idea, one just has to ask Copilot, or any text to image AI program. They create in exquisite detail the tone and style of the image.

I use Adobe Photoshop and Indesign to create pitch decks.  Adobe had done a fabulous job of integrating the AI directly into the program, simplifying the process.

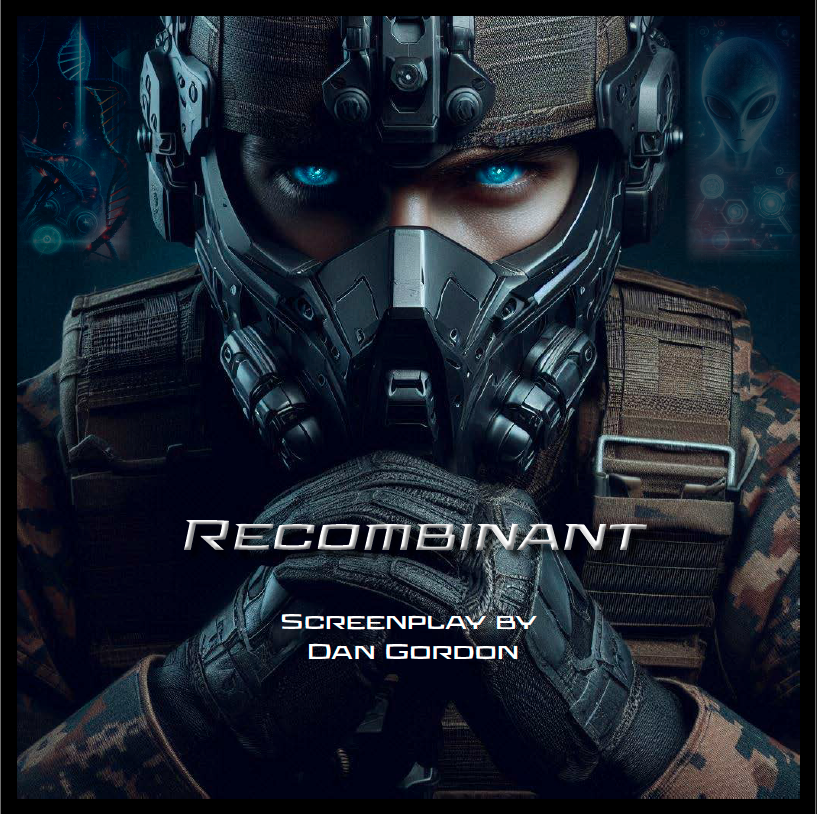
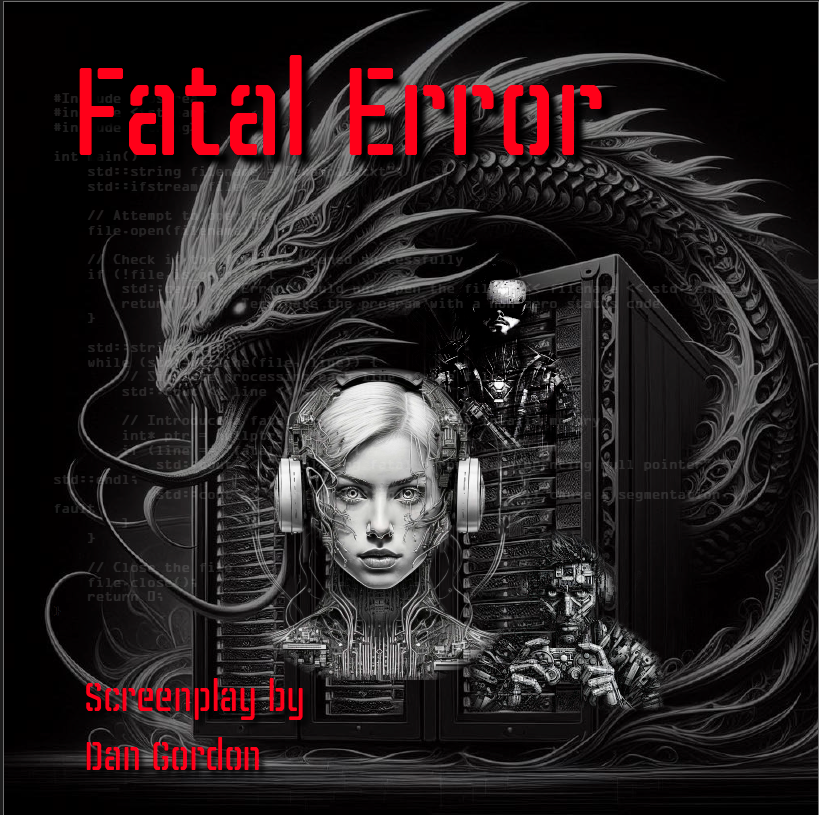
Here's two examples of cover art from recent pitch decks I created:

Recombinant
Fatal Error

Reflections On Being An Indie Film Producer #15

THE DIRECTOR'S CUT:
Film Score

After we agreed on the final edit, the movie was “locked”. At this point, it was time to find a composer for the soundtrack to Blood Pledge. Of course, it was more complicated than we expected—our lawyer made it clear she would not handle contracts for music.

Legally, music licensing is a specialty because of the various agreements that must be in place. It’s based on whether it’s already copyrighted music (more on that) or an original composition for the film. Here, one has to deal with a contract with the composer.

We wanted to use the song “Digging in the Dirt” by Peter Gabriel for our end credits. We reached out to his publishing company, filled out the form, and explained we were a microbudget and probably could afford about $200. I also mentioned it was a “long shot.” Well, they responded with “A very long shot.” And that was it… I believe the licensing cost was close to $10,000.

They say Hollywood is all about relationships. And it’s true. Except for the actors we hired, everyone else who worked on Blood Pledge was someone we knew personally or professionally.

Janet has a musician friend with many original compositions, and she pitched the idea of having his music in our movie. He agreed to license two songs that worked well in Blood Pledge. You can check out Doug Walters here and here.

However, every film needs a music score for emotional depth, and we ran into our usual issue of not having the funds to hire a composer.

Gib saved the day—he had worked with Silvio Amato, a well-established composer on numerous films, and Silvio agreed to work with us within our budget. The only caveat was he worked only with Gib, and the score would be a final mix. My understanding is the director has creative input during the process, but given Silvio’s experience with film scores, we agreed.

The best part of the process and, in fact, my favorite part of post-production was having meetings with Silvio to discuss the kind of music we wanted and talk about music. It’s an awesome experience working with an experienced film composer. I’m a huge fan of classical music and scores for science fiction films, so we discussed those aspects, and he gave great feedback and appreciated the fact I wanted to go in that direction.

When Silvio delivered the score, we were simply astonished by his ability to capture the mood and enhance every scene with music. Blood Pledge was a complete film now.

On a last note, in one scene, a quirky dream state exists with a future victim. Silvio used a medieval choral-like score which was haunting and yet perfectly fit with the subtext of the scene.

You can check out the results here: Blood Pledge

And if you want to see how complicated a music license can be, see this.

Reflections On Being An Indie Film Producer #14

#14 Visual Effects, part 2

After completing the arduous task of getting a viable work flow, it was time to have creative fun with visual effects in Blood Pledge. We discovered there are 3 types of effects needed. They are:

1.   Clean-up

2.  Enhancements

3. “The money shot”

Clean-up is just as it sounds. There’s a lot going during the shoot, and we missed glaring errors in the filming. Most notably, all the actors wore wireless mic kits which were attached on their lower back, out of sight. Of course, they move and turn and in the post you see an obvious mic kit. The digital clean-up technology is quite remarkable in this regard. They simply erase the kit and replace it with matching color and texture from the wardrobe. We found around 40 clips that needed clean up.

Because of insurance costs, we instructed our armorer not to bring any kind of ammunition to the set. In the rifle scene, Matthew did an excellent job of faking the recoil from an empty rifle, which was a shotgun, but hey, that’s what the armorer brought. Obviously, this needed to be enhanced for realism. We went back and forth with the VFX team because they kept getting the muzzle blast “wrong.” They kept using a pistol style blast and modifying it. Eventually, they came around to my side after I sent them a YouTube clip with the exact visual from a hunting rifle.

Following that, the death scene of Matthew’s victim also became a back-and-forth discussion. To be honest, this was quite interesting to do, as it’s another form of creating a scene. They added the usual blood splatter from a gun wound, which looked great until we looked at it frame by frame. Then it didn’t look great. Gib intervened and was satisfied with the results since most everyone doesn’t look at movies frame by frame, only directors.

Last thought on enhancements—I wasn’t happy about the pooling blood scene. It looked like animation. Blood doesn’t spread along a floor in a perfect circle with a flat surface. Blood expands in a scallop formation with irregular textures. Well, I got the scalloping, but the texturing turned out to be beyond our budget.

Finally, the “money shot.” Big callout to Janet Place for insisting on a frightening horror visual and finding the funds to get the extraordinary results. It paid off. When I sat with the colorist for the first view, she gasped and grabbed my arm. The scene had its intended effect.

You can see the results here.

Reflections On Being An Indie Film Producer #13

THE DIRECTOR'S CUT
Visual Effects, part 1

Like every other aspect of post-production, we found visual effects to be complicated, technically challenging and time consuming. We thought, “Gee, we’ll just hand this off to a VFX studio and just get back a final product.”

Didn’t work out that way…

For starters, we had to deal with outputting the frames from the original data source to a format that the VFX folks could work with. Should have been simple, it was not. Our visual effects editor, “Spike” wanted the frames in a format known as “open exr” the industry standard for adding effects. Our film editor, “Gib” felt that Spike should take the original format and do the conversion. Emails went back and forth with no resolution in sight. So “Dan” the director, besides now working full time on the sound edit, became a visual effects supervisor.

Essentially, I had to convert from the raw data to the open exr format. Sounds rather straightforward, right? Almost. The process involved first importing the clip into Adobe Premiere Pro, then exporting to After Effects which supports the exr format. It took several hours of trial and error to get the resolution, color depth and aspect ratio to be consistent with the original format.

Then, we had to deal with file sizes. Each exr frame came in at 200 megabytes. Thus, a three second clip at 24 frames per second comes out to 14.4 gigabytes! We had 60 clips that ran as long as 15 seconds to deal with and bandwidth and storage became an issue. We could only upload several clips in a day as to not exceed data storage restrictions.

Okay, we got past that hurdle only to discover when Gib reinserted the final VFX clips back into Blood Pledge, the timing was off. The clips were too short, leaving these black gaps in the movie.

Again, we had to interrupt VFX production to solve this issue. Turns out open exr seems to prefer a 30 frame rate. We shot Blood Pledge in cinematic 24 frame. I assumed After Effects would follow the native frame rate of 24—No, of course not. Even after we discovered this bias, the clips were still coming back too short.

Turns out a “frame” to a computer can be quite arbitrary. Unlike real film which has fixed images, software can interpolate as many frames as it likes in one second. So Spike’s team had to adjust their software as well because VFX software also prefers 30 frames per second.

Now that we had the technical issues solved, it was time to output the visual effects. In next week’s blog, I’ll discuss the new challenges with creating the final image.

You can find out more about open exr here.

Blood Pledge had over 20 effects, you can check out the results here.

Reflections On Being An Indie Film Producer #12

The Director's Cut
Software, part 2

This week’s blog discusses post production software in filmmaking. There’s a distinction between using software in pre-production vs. post.

Post production is more creative and lots more fun. Of course, the cleanup can be quite tedious and time consuming. Having said that, the possibilities are endless in post. Once the film is locked by the editor and the cleanup is complete, the fun starts. We found in Blood Pledge several horror scenes lacked a certain punch because of our limited budget.

The magic starts with the incredible selection of software plugins available to create Hollywood level special effects. In blog #10, I discussed the use of Kronos Simple Monsters to enhance the voice.

To improve the intensity and anxiety feel of the video portion, I found a plugin called “Twitch” from Video Copilot, which created light chaos and shake randomness in the scenes, making them feel stylistically uncomfortable, consistent with most horror films. Even a subtle use of Twitch had a dramatic effect. And, the cost of plugins is quite reasonable for the results they provide. Note, Twitch is designed for After Effects.

One last word on post. It’s crucial to discuss with the editor the system they use. Gib Jaffe, being an A-list editor used Media Composer, made by Avid—the choice of most studio editors. We wanted to edit the sound with Adobe audition, since we were already licensed for Adobe and I was familiar with it, but found the complexity of converting between editing systems technically prohibitive.

In the end, it worked out. We chose ProTools, which is the compliment to Media Composer and is an industry standard. Plus, it provided additional plugins and supported all the purchased plugins we used, which was not the case for Audition.

You can see the results here:  Blood Pledge

Reflections On Being An Indie Film Producer #11

The Director's Cut
Software, part 1

This week's blog will focus on preproduction software.

The obvious – collaborative tools and communication

Microsoft Office, Google docs and Zoom

The three of us who produced Blood Pledge lived in three different states. We found that Google Docs was the best platform for coordinating notes in all aspects of the preproduction. We used “Sheets” extensively to create checklists, inventory control and task assignment.

Google docs is a fantastic platform. For three reasons:
1. It’s free. All you need is an email account with Google.
2. The collaborative aspect of Docs is way superior to Office. Google has done a great job in allowing several users to work on a document in real time together. And it’s a painless process.
3. 15 gigabytes are a very generous amount to provide as free storage. It fills quickly as you’ll be uploading actor’s reels and digital images.

The somewhat obvious – screenwriting software

We used Movie Magic Screenwriter. I’ve been using the program since its early days. Back then it was DOS based (if you’re old enough to remember that) and called “Script Thing.” Plus, they gave you a free T-shirt with every purchase.

But seriously, MM is a great platform because:
1. It’s ridiculously easy to use.
2. The navigation features allow for outlining.
3. The notes feature allows for personalized feedback from everyone involved with the script.
4. Post production. With MM, you can “lock” the script and create breakdowns for different departments to determine their needs.

The not so obvious - scheduling and budgeting

Here, a producer could use Office or Docs I suppose, but there’s specialized software for this and you’ll find (as we did) both these aspects are enormously complex, even for a microbudget. Fortunately for us, Janet has extensive experience in this area of production and as a result, we used:

Movie Magic* Scheduling
After we had the script locked, we arranged for production and found our cabin in the Mountains of North Carolina. We ended up with just 12 days to shoot Blood Pledge. With 120 scenes, that’s quite an undertaking. In fact, we would not have been able to complete Blood Pledge without MM Scheduling. Once all the scenes were entered, it creates a real time schedule which is highly flexible.

Like when it rains. The weather disrupted our exterior shoots, but we could quickly rearrange the schedule and stay on track with the help of MM scheduling. We were amazed at how complex a shooting schedule becomes when you’re juggling Int. vs. Ext., actor’s schedules, time of day and, of course, the weather.

Movie Magic* Budgeting
Excel is a great program for creating budgets, but there’s lots of hidden costs and estimates that MM Budgeting makes you painfully aware of. Highly recommended.

In next week’s blog I’ll discuss post production software. Please note, these programs are by no means the only options out there. However, I will point out they worked flawlessly for us and prevented unnecessary technical issues. Curious to see what other filmmakers use in their process.

*MM Screenwriter is owned by Write Brothers. MM Budgeting and Scheduling are part of Entertainment Partners.

Check out the results here: Blood Pledge
Reflections On Being An Indie Film Producer #10

The Director’s cut
Sound, part 2

Post Production Sound

The reason post sound production is expensive is that there are 3 components involved. They are:

  1. Sound editing
  2. Sound mixing
  3. Sound design

Sound editing involves the most basic aspect of post sound production. Essentially, making sure the sound is there, synched with the video, and adding additional sounds to fill in the gaps. Fortunately for us, Gib Jaffe has extensive experience as a sound editor and delivered Blood Pledge with a complete sound edit.

Our process started with the sound mix. As mentioned earlier, we didn’t have the budget (at least $15,000) to pay for a full service mix and design. After further discussion, we decided to complete the sound mix and design ourselves.

Like the technological advances for cameras, I presumed there would be similar developments for sound. And of course, there were. Initially, we considered editing with Adobe Audition, an excellent “prosumer” package. Two issues arose, and they were:

1. Poor sound quality in many scenes.
2. Constant background noise from an unruly stream nearby.

Working with Audition would take at least a year to clean up the sound this way. I now understood why post sound is so expensive. After a month of learning from the sound pros on YouTube, we realized we were not going to get satisfactory results.

And then, the light at the end of tunnel: Izotope Post Production Suite. Simply put, it’s like having a sound engineer and designer working with you. The software is magic—deep machine learning coupled with AI produced high-quality results. We completed the sound mix in two months.

And that's when the fun started: sound design, which I quickly learned is a form of storytelling. Sound design relies heavily on the use of sound effects, subtle background noises, and voice modification through plugins. And these are creative decisions to augment the viewer’s experience of Blood Pledge.

To enhance the “alien” voices, we used Kronos simple monsters, which converts normal dialogue into various kinds of frightening voices. Plus, since we used ProTools, we discovered more cool plugins native to that program.

In the end, it took six months to complete post sound, which was mostly handled on weekends. Total cost came in at about $1,500—Izotope Production Suite on sale, Kronos simple monsters plus a monthly subscription to ProTools. Also, we purchased a pair of Sony studio headphones (MDR-7506) – essential for getting a “neutral” sound.

You can check out the results here: Blood Pledge
Reflections On Being An Indie Film Producer #9

The Director’s cut
Sound, part 1

Production Sound
We decided to purchase our own sound equipment and hire a boom operator to use in conjunction with wireless mics to capture the actors and all ambient sound during the shoots. We bought a Tascam DR-70D 4 channel recorder and 4 wireless mics and transmitters on Amazon from some off brand sound company in China. The total cost for the equipment came in at less than $1,000, including the boom setup and mic.

I would not use this configuration again. Although the sound quality was decent but certainly not comparable to say a Sennheiser system, the biggest issue became reliability.

By the end of the shoot, we had no working wireless mics and a channel failed on the Tascam recorder. Wireless transmitters take a beating during shoots, especially during physical scenes! The channel loss was not an issue as we were only using 3 channels, but we had to keep track of the lost channel so it was not inadvertently used during the shoot.

Fortunately for us, Janet Place, the producer, brought her Tascam recorder as well as 2 wireless mics, so we managed to finish Blood Pledge with the bare minimum.

Post Sound
They say in Hollywood an audience will forgive for poor footage but not poor sound. Psychologically, that’s definitely true. Fortunately for us, Gib Jaffe, our editor, also had years of experience as a sound editor. We had about 10 clips where the sound was simply unusable. He came up with a great plan–have the actors re-record their lines using their cell phones and email the recordings.

The results were surprisingly good. Once edited into the clip, it was hard to distinguish between the source and rerecorded sound. After Gib had completed the edit, he gave me several recommendations for the studios that specialized in sound mix, foleys and sound design. The estimates came in at $15,000 to $35,000! Post production sound is expensive, and we did not have that kind of budget… What to do?

In next week’s blog, I’ll discuss how we solved this major hurdle.

You can hear the results here: Blood Pledge

Reflections On Being An Indie Film Producer #8

The Director’s Cut
Choosing your camera, part 2

There are four considerations to be made when purchasing a consumer digital camera for shooting a microbudget feature. They are:

1. System
2. Color model
3. Lenses
4. Resolution

I discussed the first two items in last week’s blog. Today, I’ll expand on the lenses we used. We chose to use the lens provided with the Lumix, which was the equivalent of 50mm SLR. We also purchased a zoom lens, which came in quite handy for extreme close-ups as it had a macro feature. Thus, we completely shot Blood Pledge using two consumer grade lenses.

I would have liked to have purchased a professional F1.4 lens, however the cost was prohibitive at the time. We had about half our shots at night and wanted to use the only artificial candle light for a spooky feel. Unfortunately, both lenses only opened up to an aperture of F2.4 and F3.5, which required extra lighting.

So, if you have a lot of night shots, I would recommend getting the F1.4 lens. However, these lenses start at $700 - the price of our camera system.

1080 or 4K?

4K is all the rage these days, and NASA is already using an 8K camera system on the International Space Station. We decided to go with 1080 or what is also known as “HD”. Two reasons:

1. Cost
2. Intended audience

The Lumix G7 supports 4K shooting, and I considered recording all the shots in this mode. However, during our test runs, the camera would occasionally lock up, especially during complex scenes involving a lot of movement. Although that made me reconsider using 4K, we discussed our viewing audience and knew Blood Pledge was destined for home TVs.  4K makes perfect sense for theatrical releases. Add to that, the HD test runs looked fantastic on a 70 inch 4K TV. Plus, there was the cost.

We needed about 30 64GB SD cards for the entire shoot. HD cards at that time were about $11. Doing the math, that comes out to $330. Not bad considering what film used to cost and process. For a 4K 64GB SD card then, the cost per card started at $70 and the brand that worked best with our system was $90. Yikes! That’s $2,700! And add to that, there was the issue of card i/o speed, or how fast a card could “read” the scene, which, as I mentioned, was not reliable.

So, when choosing a consumer camera, I would recommend taking these 4 aspects into consideration. Unfortunately, the marketing of digital cameras rarely touch on these specs but they’re vital to the shoot.

You can see the results here: Blood Pledge

Reflections On Being An Indie Film Producer #7

The Director’s Cut

Choosing your camera, part 1

Because of our microbudget, we chose to purchase two affordable digital cameras instead of hiring a DP and getting a professional camera package. As I had a background in IT and photography, I did my homework on the most recent technologies available for shooting on a consumer grade camera. In 2018, Panasonic had just released their latest consumer camera system – a “4/3 mirrorless” with a 16 megapixel sensor. The reviews were glowing.

The Camera

The Panasonic Lumix G7 was an entry level camera with a zoom lens, which had an impressive set of features for a camera under a $1000. Panasonic's color model produced lifelike colors and the image quality was superb. Plus, the camera sported a “cinematic mode 24 frames” which I used for all the shoots.

Be Prepared!

We knew the Blood Pledge production was going to be intense, and we had to complete over a hundred scenes at 5 locations in 11 days. So… I recruited my neighbor, Ted Leplat, who is a veteran stage and film actor with over 50 years of experience, to practice filming with me so I could gain an in-depth knowledge of this camera. Ted was more than happy to work on the project. He got hours of footage for his reel, and I learned every aspect of the Lumix system. We shot in every kind of light - day and night, indoor and outdoor, studio, candles, incandescent, lampposts, headlights and fluorescents. All these were in the script and practicing this way, allowed for trial and error to determine the ideal settings.

The editor was in denial

I can’t recommend enough knowing your camera. With just two days of shooting, the limitations of a consumer-based camera became obvious. They’re not designed for complex moving images common in feature films. Yet, the film's editor Gib Jaffe and our colorist Jaynee Thorne, both who have decades of experience in post-production, didn’t believe we shot Blood Pledge on a $700 camera despite its limitations!

Can’t control the weather

My secret? Ted and I practiced together for 6 months before and when I arrived on set in North Carolina, we completed the 11 days of shooting without a hitch. We were prepared for anything. However, since I chose to use a manual aperture setting for creative control, about 5% of the film unfortunately had been overexposed, mostly due to changing outdoor lighting conditions. North Carolina's weather differs greatly from sunny SoCal’s. Fortunately, Jaynee used her magic wand, notably DaVinci Resolve, and produced outstanding results.

Here’s the breakdown for the Lumix G7 camera:

Pros

  • Excellent color model
  • 1080—4K quality
  • Cinematic mode

Cons

  • No real time monitor support
  • Autofocus not suitable for a feature
  • Found manual aperture settings gave better results with more creative control but required longer setup times.

You can see the results here:  Blood Pledge